This guide will walk you through how to host a Garry’s Mod server through playit.gg
Requirements
- Garry’s Mod - [steampowered.com]
- Garry’s Mod Dedicated Server - [steampowered.com]
Server
This server is available for download with SteamCMD . To install with SteamCMD, open it in a command line. You can do this by navigating to your install location, and opening a command with your address bar (did you know you could do that?)
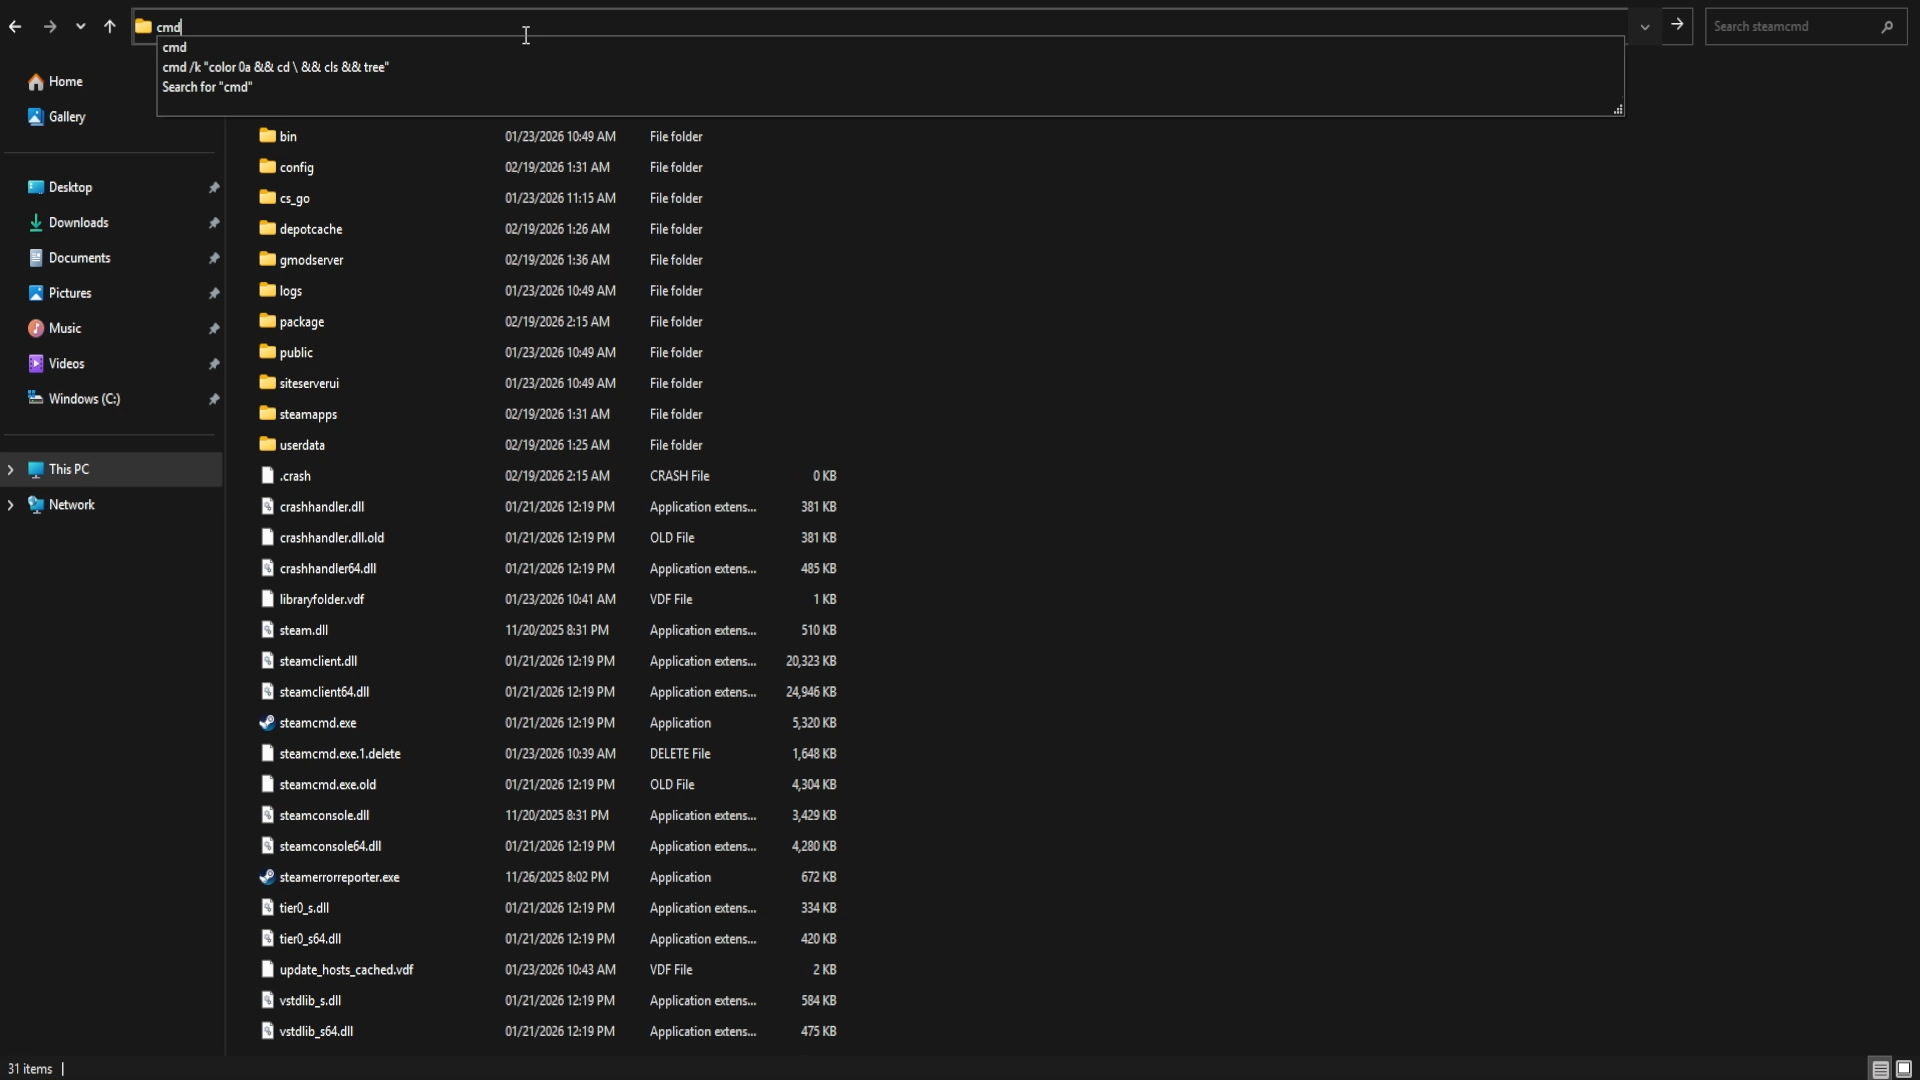
Now that we’re in the SteamCMD directory, we need to tell it where it should download the server files. To do this, we can use the force_install_dir command. For example, if you want this directly on your main drive, you can use force_install_dir C:\GarrysModServer\
You can now log into SteamCMD using login anonymous, and to download the server use app_update 4020 validate where 4020 is the Steam App ID.
Configuring the server
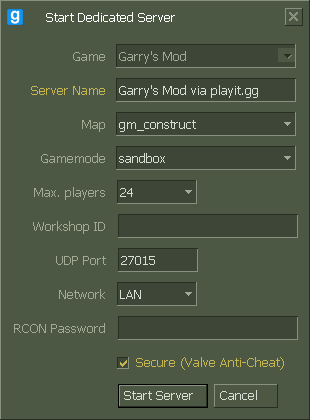
Now that the server has been downloaded, we can configure it. Navigate to the server’s file path. This will be where you told it to download when using SteamCMD.
Open srcds.exe and set the Network to LAN. Feel free to set other properties, such as map, gamemode, and max players.
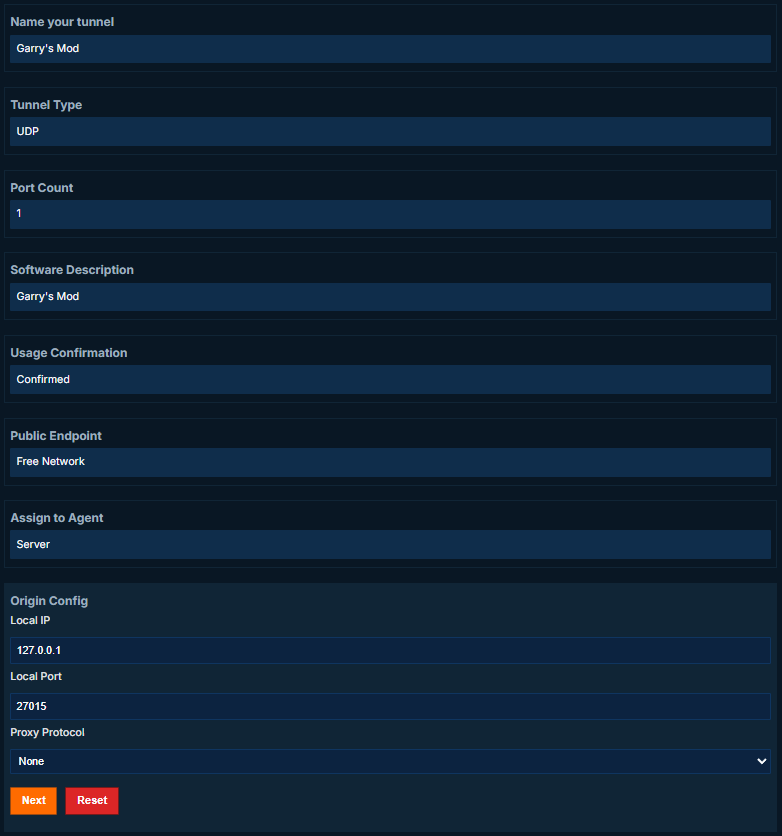
Creating a tunnel
This server uses
UDP 27015, which means that all users can create this tunnel type.
Set up the tunnel as follows:
Tunnel Type: UDP (protocol)
Port Count: 1
Local Port: 27015
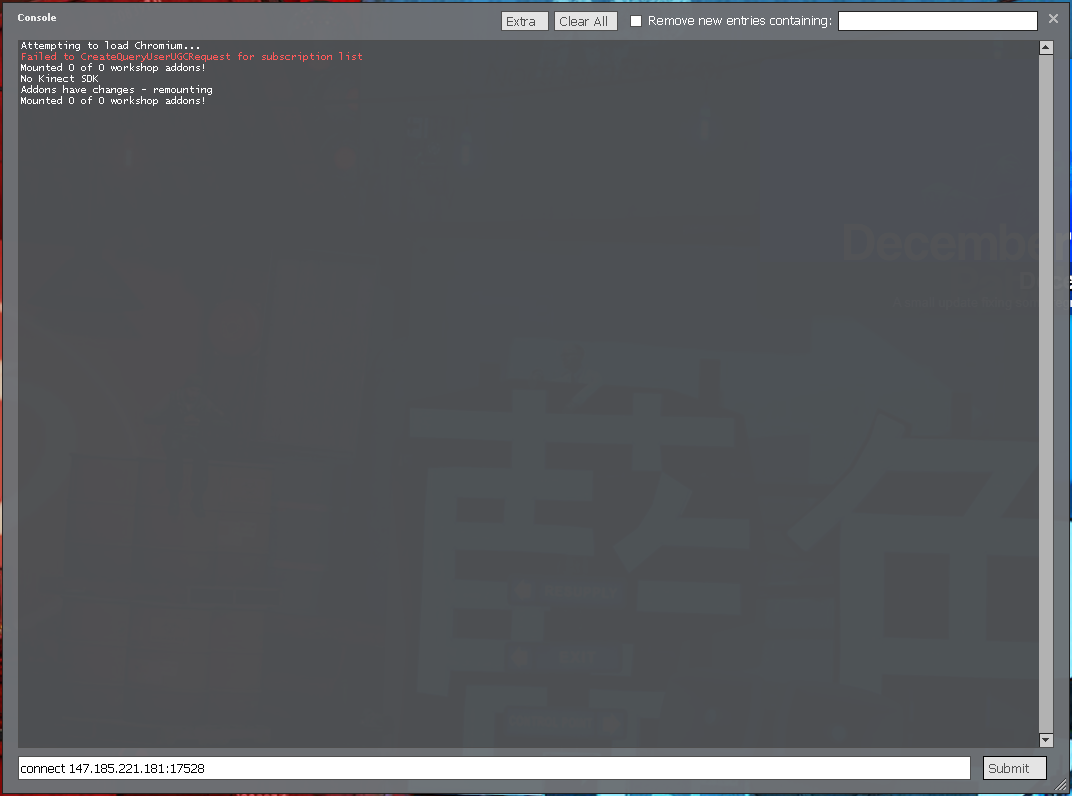
Joining the server
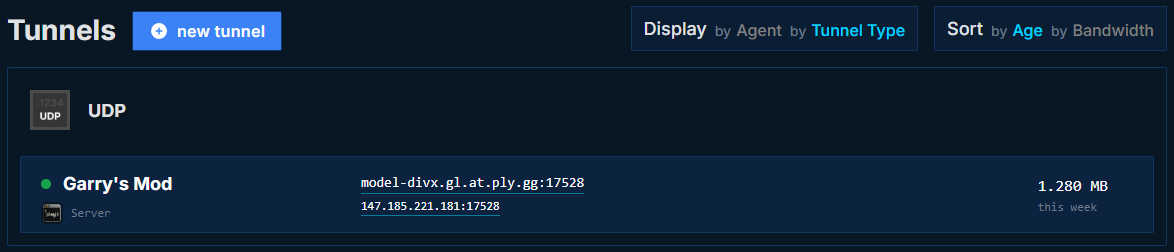
Inside of Garry’s Mod, open the console by pressing the ~ key. You can connect to the server by using the connect command along with your assigned IP address or hostname. For example, connect 147.185.221.181:17528 or connect model-divx.gl.at.ply.gg:17528. Modify these values with your own tunnel information, as this will be different for every user. Submit the command, and you should be able to connect to the server.