Requirements
Server
- Dedicated Minecraft Server Software (e.g. Fabric Server)
- Simple Voice Chat
Client
- Minecraft client
- Client-side modloader (e.g. Fabric)
- Simple Voice Chat installed on the client
⚠️ Simple Voice Chat must be installed on both the server and the client for voice to work.
Setting Everything Up (Server)
Install Simple Voice Chat
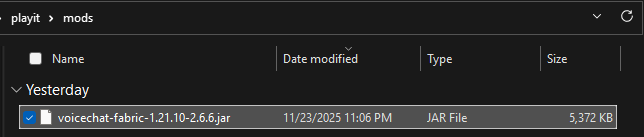
Place the Simple Voice Chat .jar file into the appropriate folder inside your Minecraft server directory:
mods/(Fabric / Forge)plugins/(Paper / Spigot)
Generate Configuration Files
- Start the Minecraft server
- Wait until it fully loads
- Stop the server
This will generate the required configuration files for Simple Voice Chat.
Create a Tunnel
- Choose an agent for the tunnel
- Create a new UDP tunnel
- Configure it as follows:
Protocol: UDP
Port Count: 1
Local Port: 24454
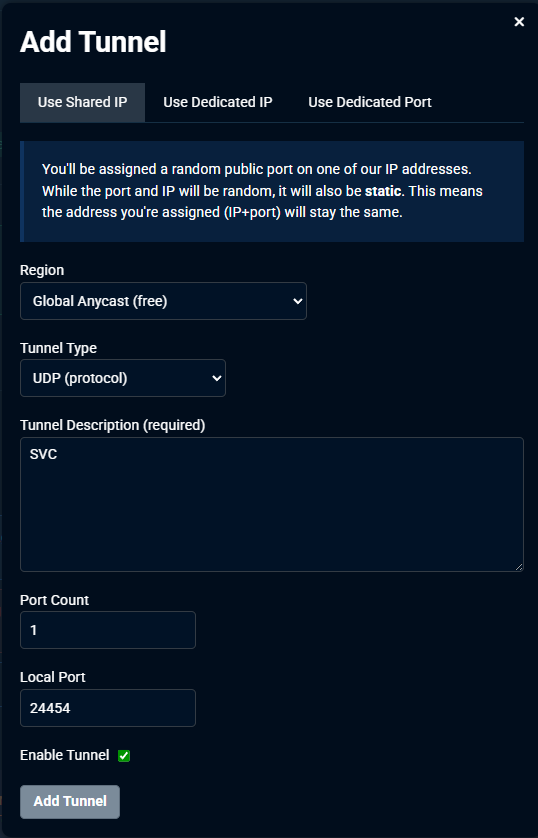
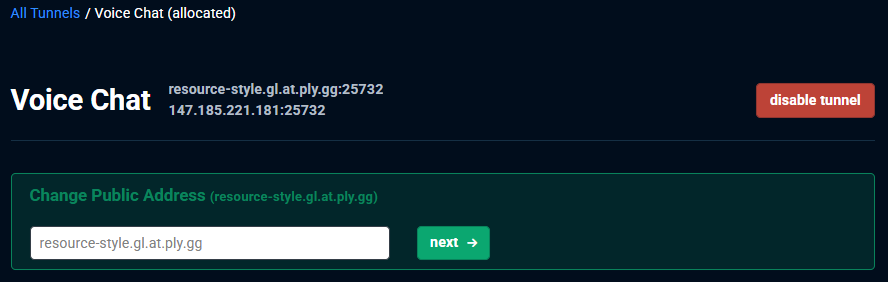
After creating the tunnel, go back to the tunnel overview, and note the IP address and port shown alongside the tunnel
Configure Simple Voice Chat
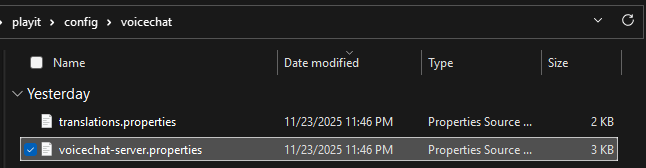
Navigate to the Simple Voice Chat server configuration file:
./config/voicechat/voicechat-server.properties
Modify the following values:
bind_address=*
voice_host=IP_ADDRESS:PORT
Replace IP_ADDRESS:PORT with the IP address and port provided by playit.
Dedicated IP users may choose to use the default port
24454
Example:
bind_address=*
voice_host=147.185.221.181:25732
Save the file.
Start the Server
Start the Minecraft server again to apply the changes.
If configured correctly, Simple Voice Chat will now bind to the tunnel.
Setting Everything Up (Player)
Install a Modloader
Install a client-side modloader such as Fabric.
Install Simple Voice Chat (Client)
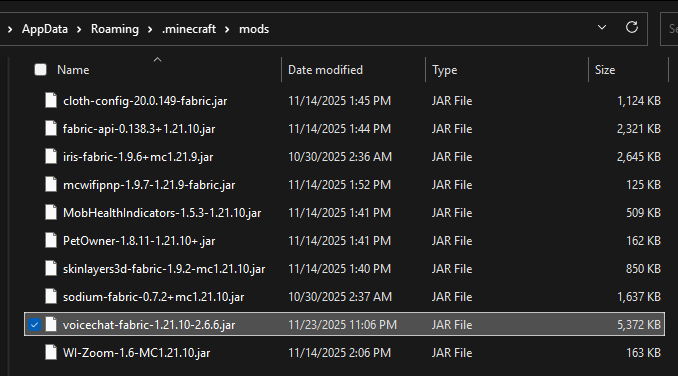
- Navigate to your Minecraft mods folder:
%AppData%/.minecraft/mods
- Ensure the Simple Voice Chat
.jarfile is present
If the mod is not installed on the client, you will not be able to hear or talk to other players.
Done
Simple Voice Chat should now work over playit, allowing players to communicate using proximity voice chat.